All posts in “gluten free”

Harvest Soup

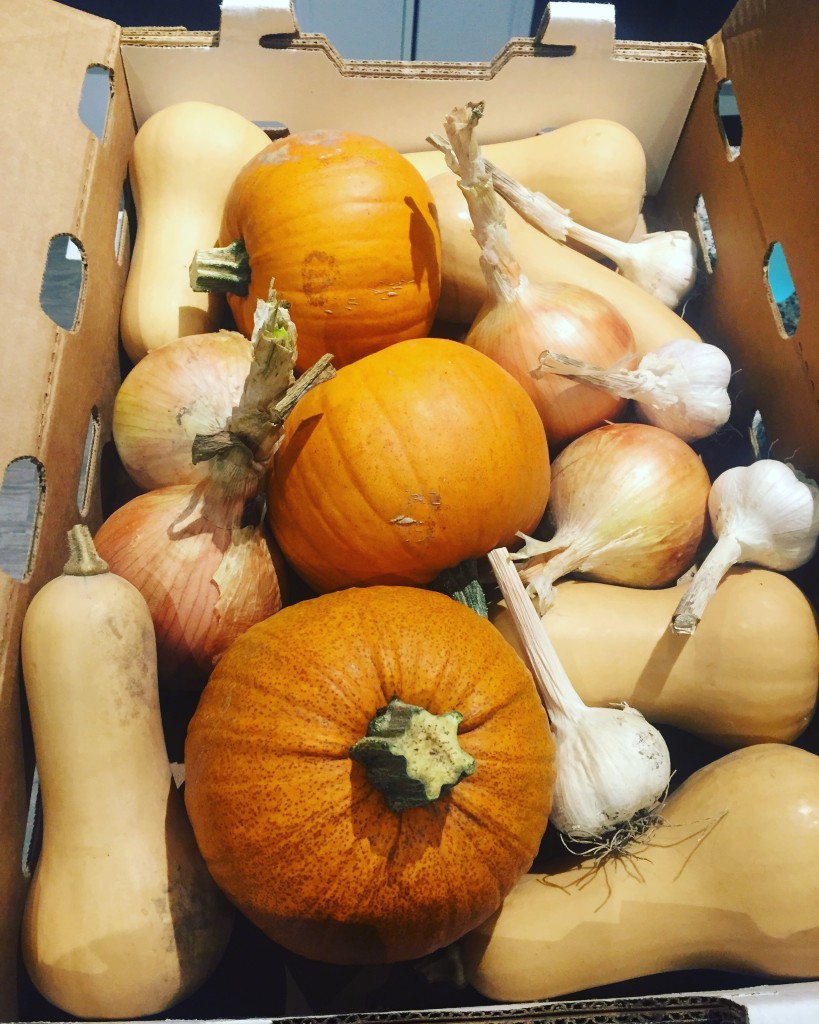
I recently recieved a humongous box filled with squash, onions, pumpkins and garlic from my boyfriends Grandmas garden. It was just sitting there in my kitchen when I came home from work one night, and I have to say I haven’t been so excited in my life! If you ever want to make me super happy, all you have to do is bring me beautiful, local produce and just like that we will be best friends 🙂

image


So with all of this amazing produce, I knew I had to make a crap ton of soup.

When the colder months hit, your body naturally craves warm foods, such a soups, hot tea, and ground vegetables because they are in season. It’s just weird eating strawberries in the middle of winter right? (Plus they taste horrible)

So here is a soup recipe that I totally winged. I didn’t follow any particular guidelines, I just went with the flow and added in whatever I wanted. This is my favourite way to cook because you can let your imagination and creativity fly – and also use up whatever you have in the fridge at the same time! It’s a win win.

Like I said, this is a very versitle dish and you can add in whatever you want, if you don’t have squash, but want to use pumpkin, go for it! The options are endless.

Heres what you’ll need:

  • 1 medium sized onion
  • 1 bulb of garlic (yes the entire bulb)
  • 2 medium sized Butternut squash
  • 4 large carrots
  • 2 Granny Smith apples
  • 1 1/2 teaspoons curry powder
  • 1 teaspoon tumeric
  •  1/2 teaspoon cumin
  • 2 table spoons olive oil (or coconut oil)
  • pinch of salt and pepper
  • 3 large stalks of celary
  •  3 parsnips (optional)
  • approx 2 cans (or boxes) of low sodium veg stalk
  • 1 inch of fresh ginger

Alright first things first

Get that squash and garlic roasting!

  1. Pre-heat your oven to 350 degrees F
  2. Grab a sheet pan and place tinfoil over for easy clean up
  3. Cut squash into halves and scoop out seeds and guts
  4. Place onto baking sheet flesh side up, drizzle with olive oil, salt & pepper
  5. Grab an entire bulb of garlic, trim the end and place into a  piece of tinfoil. Drizzle with olive oil, and wrap that baby up
  6. Toss into oven for 40 minutes

While that is roasting, lets build our soup.

  1. Grab a large pot and drizzle with olive oil, over medium heat
  2. Add in onions, celary, carrots, ginger and parsnips. Cook for about 5-7 minutes till softened
  3. Next add in your curry powder, tumeric, cumin and salt. Stir to combine. Cook for another 5 minutes
  4. Now we can add in our Veg stalk. We will be blending the soup once it’s done so Depending on how thick you like it, I found the 2 boxes of stalk gave it a nice consistency, but if you like it a bit thicker simply use less stalk!
  5. Let soup simmer on medium-low for 15 minutes.

Once the squash and garlic are done, pull them out of oven and let cool  so their easy to handle. This is something you can do in advance so your not playing hot potato with the squash.

Scoop the flesh of your squash into the pot, and squeeze garlic in as well (my favourite part) . Stir to combine. If you have time you can let that simmer for as long as you want. When your ready blend up your soup with an immersion blender (or hand blender) If you don’t have this tool you can also plop it into a regular blender. You will have to blend in small batches.

Give your soup a taste, add some fresh cracked pepper, and salt if needed. That’s it!

This makes 12 servings, so unless your making it for Sunday dinner, you can freeze half and have ready to go whenever your craving it.


I hope you enjoy!

Lauren xo

Chana Masala stuffed Acorn Squash

Now that we’re getting into the colder months here in Canada, it’s only fitting to make a spicy curry paired with a winter squash bowl! This dish is sure to warm your soul.

Not to mention it’s incredibly delicious, gluten free, and dairy free 🙂

You may be thinking.. What in the hay is Chana Masala!? Well, it’s pretty simple. Chana is an Indian chickpea curry! You can make this dish as mild or spicy as you’d like.

This dish does have a few steps, but they are all super simple, I promise you will want to make it over and over again.


Chana Masala Recipe is from the “Oh she Glows” cookbook. (Surprise suprise)


Alright let’s get to it.

Here’s what you’ll need:

  • 1 medium sized onion
  • 1 clove garlic
  • 1 inch of fresh ginger
  • Drizzle of olive oil for pan (and for acorn squash)
  • 1 1/2 teaspoons cumin
  • 1 1/2 teaspoons garam masala
  • 1 1/2 teaspoons ground coriander
  • 1/2 teaspoon ground turmeric (I add a bit more cause I love turmeric)
  • Pinch of salt and pepper
  • 1/4 teaspoon cayenne pepper (for some heat)
  • 1 can whole peeled or diced tomatoes and their juices
  • 1 can of chickpeas
  • 1 cup of dry brown rice, for serving
  • fresh lemon juice for serving
  • cilantro for serving
  • 2 medium sized acorn squash


Here are the steps to make this amazing meal:

  1. Pre-heat your oven to 350 degrees
  2. Grab your acorn squash and cut into halves
  3. Scoop out seeds and guts
  4. Place onto baking sheet lined with tinfoil
  5. Drizzle a wee bit of olive oil and season with salt & pepper
  6. Pop into oven for about 40 minutes

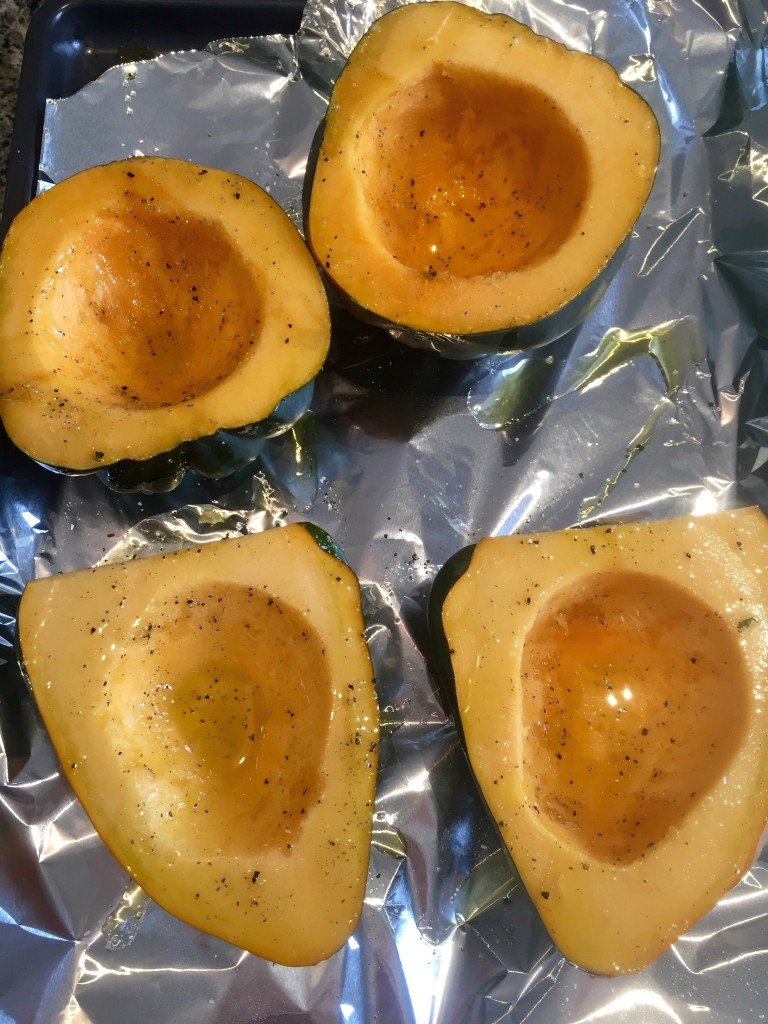
this is what it should look like before it goes into the oven:

image


Okay now that your squash is cooking away in the oven, time to get that rice going.

Cook 1 cup of rice according to your package instructions.

Heres a trick, I like to cook my rice in vegetable broth to give it some extra flavour. Otherwise water will do just fine!

While the rice is cooking, we’re going to make our Chana.


  1. In a large sauce pan or wok, heat about 1 tablespoon of olive oil over medium heat. Then add in your onions, garlic and ginger. Cook for about 2-5 minutes until it becomes fragrant.
  2. Then stir in your garam masala, coriander, turmeric, cayenne pepper and salt. Cook for a few minutes.
  3. Then add in your canned tomatoes and juices. If your using whole tomatoes, mash them up with your cooking utensil. Leave larger chunks for some added texture.
  4. Bring mixture to a simmer and let cook for another 10 minutes to allow flavours to marry.  Finish with some fresh cracked black pepper.

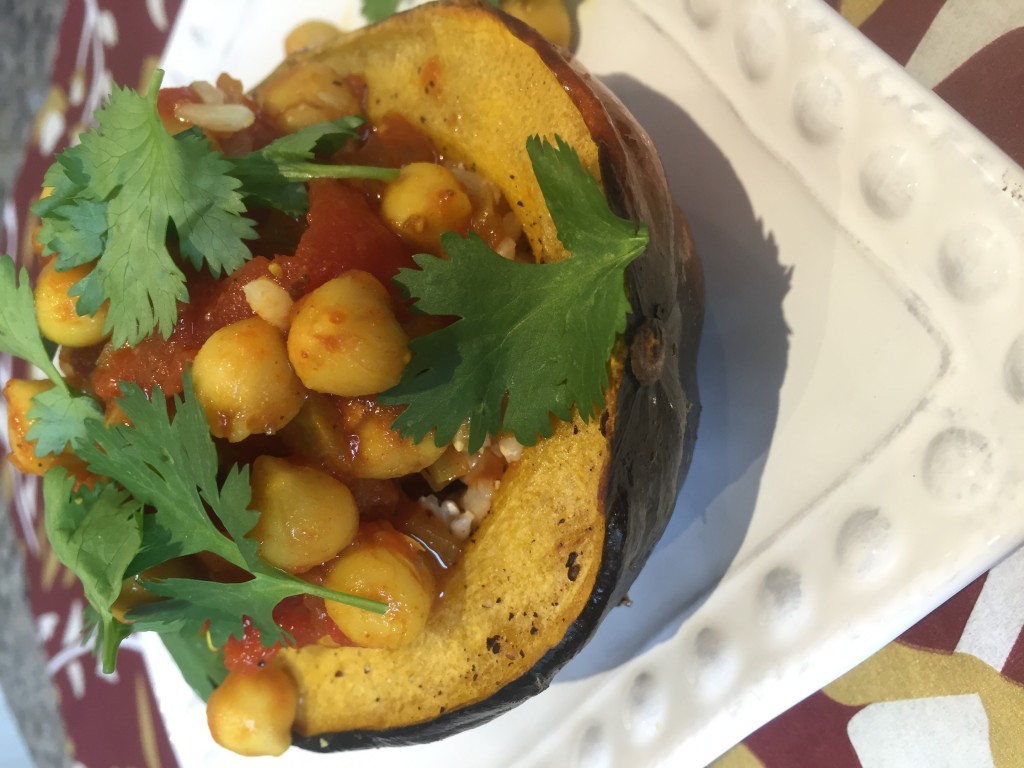
Once your rice and Acorn squash are done, simply pile as much mixture as your “bowl” will fit, and top with fresh cilantro, and a squeeze of lemon!

image


This recipe serves 4.

Enjoy!

lauren xo

Walnut Basil Pesto Pasta (GF, vegan)


Pasta pasta pasta, who doesn’t love pasta!?! I’m no Italian, but I swear I must’ve been in a past life because pasta is my secret lover (as well as other carbs) However, my waist line and tummy do not appreciate the side affects pasta and other delicious carbs give me. This is why I have created this recipe. If your looking for a healthy alternative packed full of nutrients, and is super satisfying at the same time, look no further.

This recipe is vegan, but feel free to add in free range ground turkey, or chicken for some extra protein.


Now now let’s get to it.

Here’s  what you’ll need for the pesto:

  • 1 1/2 cups of loosely packed Basil, rinsed and trimmed
  • 1 cup raw walnuts
  • 1/2 cup olive oil
  • salt and pepper to taste
  • 1-2 cloves garlic
  • Dash of cayenne pepper (optional)

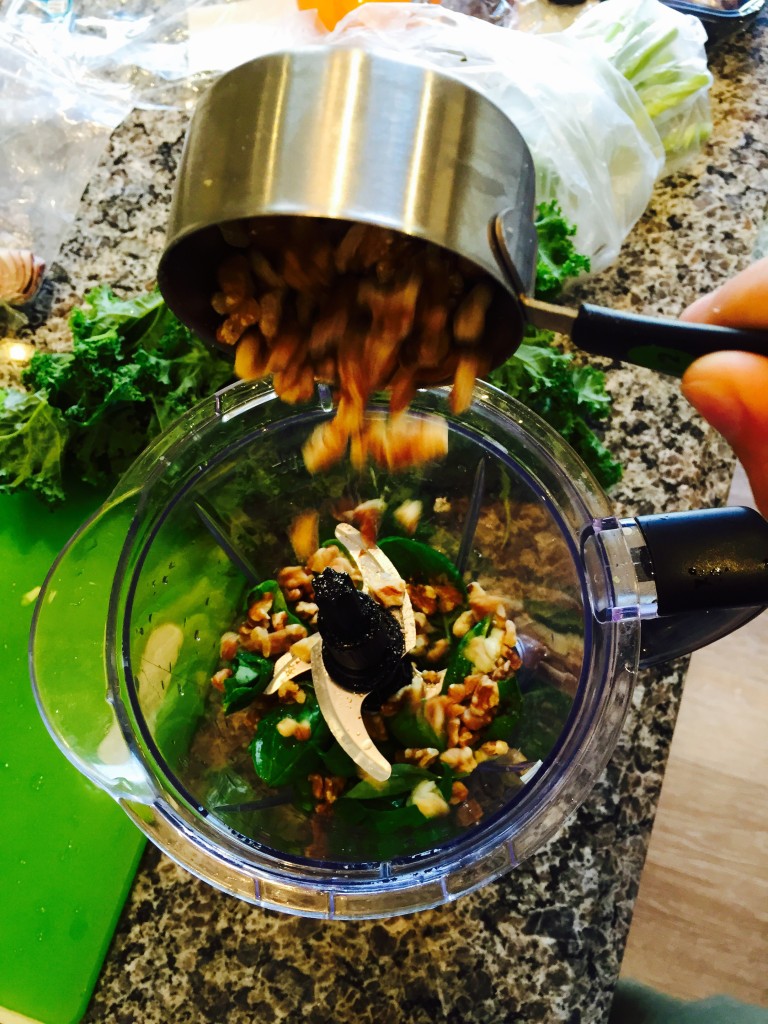
Add all ingredients (except for olive oil) into a high speed blender (you may need to stop a few times to scrape the sides) slowly add in your olive oil until it’s a creamy, paste like consistency. Set that aside.


image

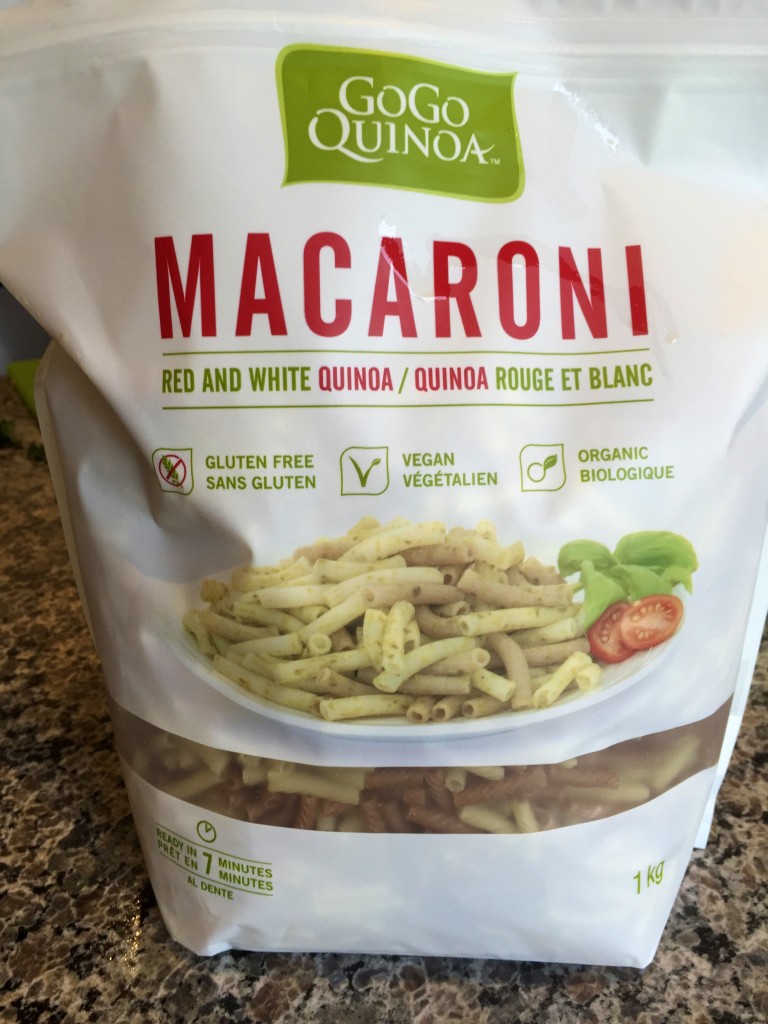
Meanwhile, get about 2 cups of pasta boiling. I used a brand called “GoGo Quinoa” which is a gluten free, vegan pasta made from quinoa! It’s delicious and seriously tastes just like normal pasta (not even kidding) I got this bag from Costco, but is also available in most super markets in the “gluten free” section.

image


While your pasta is cooking, grab a sauce pan and add in whatever veg you desire. I always start with coconut oil, garlic and onion, and then I added in kale, sweet peppers, mushrooms and tomatoes. Add a little more salt and pepper and your good to go!

Once the pasta is cooked to your liking, drain and add directly into sauce pan, along with pesto. Stir to combine, and your ready to serve!

This recipe yields 4 servings.

Enjoy!


xo lauren